


THE INQUISITION QUEST
Thais is rotting from within. Henricus of the Inquisition needs someone expendable enough to interrogate guards, burn witches, stake a vampire lord — and, at the end of it all, walk into the Demon Forge and break the power of the Ruthless Seven.


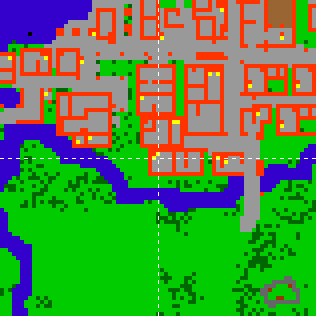
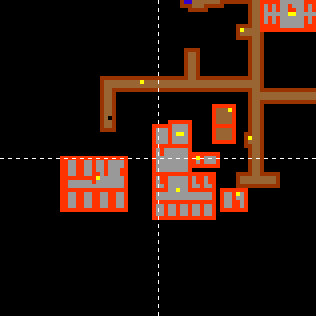
Henricus waits in the cellar beneath the Thais temple district, at the southern edge of the city — climb down the ladder just east of the temple square. Greet him, ask for a mission, and agree to join the Inquisition with yes. Then ask for a mission again — and the first assignment is yours.
After every finished mission you return to Henricus and say mission to report it and receive the next one. A burst of holy light means he accepted.
Conversation — joining the Inquisition
Player: hi
Henricus: Greetings, fellow believer Player!
Player: mission
Henricus: Do you want to join the inquisition?
Player: yes
Henricus: So be it. Now you are a member of the inquisition. You might ask me for a mission to raise in my esteem.
Player: mission
Henricus: Let's see if you are worthy. Take an inquisitor's field guide from the box in the back room. ...
Henricus: Follow the instructions in the guide to talk to the Thaian guards that protect the walls and gates of the city and test their loyalty. Then report to me about your mission.
Five Thais guards are suspected of heresy. Visit each one and probe his faith with the right questions — in the right order. When a guard has told you everything, a holy cross flashes over you and the chat shows «A holy sign marks you — this guard has been investigated.»
Say hi first, then the keywords below, one message at a time:

Conversation with Walter
Player: hi
Player: trouble
Walter: I think there is a pickpocket in town.
Player: authorities
Walter: Well, sooner or later we will get hold of that delinquent. That's for sure.
Player: avoided
Walter: You can't tell by a person's appearance who is a pickpocket and who isn't. You simply can't close the city gates for everyone.
Player: gods allow
Walter: If the gods had created the world a paradise, no one had to steal at all. ...
Walter: <A holy sign marks you - this guard has been investigated.>
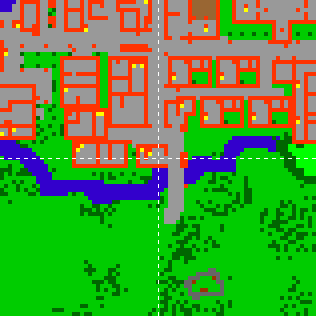
Conversation with Kulag
Player: hi
Player: trouble
Kulag: You adventurers become more and more of a pest.
Player: authorities
Kulag: They should throw you all into jail instead of giving you all those quests and rewards an honest watchman can only dream about. ...
Kulag: <A holy sign marks you - this guard has been investigated.>
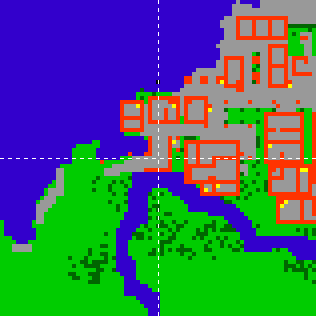
Conversation with Grof
Player: hi
Player: trouble
Grof: I think it'll rain soon and I left some laundry out for drying.
Player: authorities
Grof: Yes I'm pretty sure they have failed to send the laundry police to take care of it, you fool. ...
Grof: <A holy sign marks you - this guard has been investigated.>
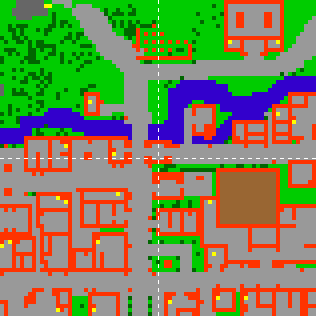
Conversation with Tim
Player: hi
Player: trouble
Tim: Ah, well. Just this morning my new toothbrush fell into the toilet.
Player: authorities
Tim: What do you mean? Of course they will immediately send someone with extra long and thin arms to retrieve it!
Player: avoided
Tim: Your humour might let end you up beaten in some dark alley, you know? No, I don't think someone could have prevented that accident!
Player: gods allow
Tim: It's not a drama!! I think there is just no god who's responsible for toothbrush safety, that's all! ...
Tim: <A holy sign marks you - this guard has been investigated.>
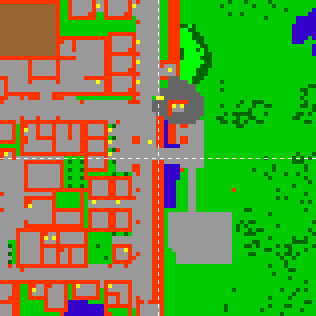
Conversation with Miles
Player: hi
Player: trouble
Miles: I'm fine. There's no trouble at all.
Player: foresight authorities
Miles: Well, of course. We live in safety and peace.
Player: also gods
Miles: I think the gods are looking after us and their hands shield us from evil.
Player: trouble arise
Miles: I think the gods and the government do their best to keep away harm from the citizens. ...
Miles: <A holy sign marks you - this guard has been investigated.>
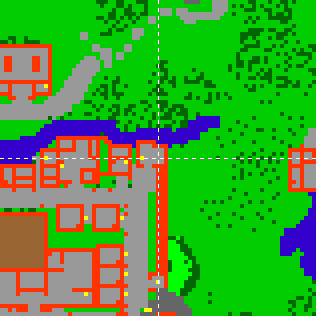
Miles is the odd one out — he has no troubles at all, so his questions are different. All five done? Report to Henricus.
Conversation — reporting to Henricus
Player: mission
Henricus: Your current mission is to investigate the reliability of certain guards. Are you done with that mission?
Player: yes
Henricus: Indeed, this is exactly what my other sources told me. Of course I knew the outcome of this investigation in advance. This was just a test. ...
Henricus: Well, now that you've proven yourself as useful, you can ask me for another mission. Let's see if you can handle some field duty, too.

Henricus hands you a vial of holy water
 and wants a coven's grimoire.
- Travel to the Femor Hills magic carpet and say eclipse to Uzon. He flies you to the witches' mountain — you land in a protection zone.
- Walk down into the camp and use the vial on the great cauldron.
- The moment the brew is destroyed, the coven answers: witches, ghouls and minotaur mages rise around you. Fight or run — your call. Witches burn well; death damage is their weakness.
- Open the chest beside the cauldron and take
 The Witches' Grimoire, then take the teleporter home and bring it to Henricus.
Uzon flies you back as many times as you need — until you report the mission. After that the eclipse is over for good, so don't report until you hold the book — and guard the book with your life: the chest gives one copy per hunter, ever. Lost the vial? Say vial to Henricus and he will consecrate another for 1,000 gold.
Conversations — Henricus & Uzon
The briefing
Player: mission
Henricus: Listen, we have information about a heretic coven that hides in a mountain called the Big Old One. The witches reach this cursed place on flying brooms and think they are safe there. ...
Henricus: I've arranged a flying carpet that will bring you to their hideout. Travel to Femor Hills and tell the carpet pilot the codeword 'eclipse' ...
Henricus: He'll bring you to your destination. At their meeting place, you'll find a cauldron in which they cook some forbidden brew ...
Henricus: Use this vial of holy water to destroy the brew. Also steal their grimoire and bring it to me.
Uzon, at the Femor Hills carpet
Player: hi
Player: eclipse
Uzon: Oh no, so the time has come? Do you really want me to fly you to this unholy place?
Player: yes
Uzon: Hold on!
Handing in the grimoire
Player: mission
Henricus: I think it's time to truly test your abilities. One of our allies has requested assistance. I think you are just the right person to help him ...
Henricus: Storkus is an old and grumpy dwarf who works as a vampire hunter since many, many decades. He's quite successful but even he has his limits. ...
Henricus: So occasionally, we send him help. In return he trains and tests our recruits. It's an advantageous agreement for both sides ...
Henricus: You'll find him in his cave at the mountain outside of Kazordoon. He'll tell you about your next mission.

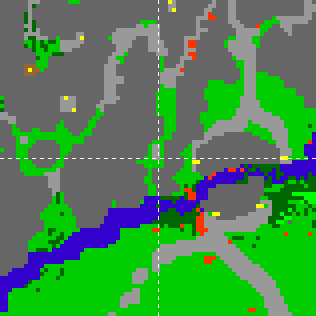
Henricus sends you to Storkus, the dwarfish vampire hunter, in his cave west of the Dwarf Bridge outside Kazordoon.
- Give Storkus all 20 Vampire Dusts at once
and ask for his mission.
- He wants a vampire lord dead: The Count. Come back to him with the proof, then report to Henricus.
Conversation — Storkus
Player: hi
Storkus: Greetings, Player! Good you're showing up.
Player: mission
Storkus: Ah, right, Henricus sent ye'! Do ye' have 20 vampire dusts with ye'?
Player: yes
Storkus: Fine, you're done! Ye' should talk to me about your mission again now.
Player: mission
Storkus: While ye' were keeping the lower ranks busy, I could get valuable information about some vampire lords. ...
Storkus: One of them is hiding somewhere beneath the Green Claw Swamp. I expect ye' to find him and kill him. ...
Storkus: But be warned: Without good preparation, ye' might get into trouble. I hope for ye' he will be sleeping in his coffin when ye' arrive. ...
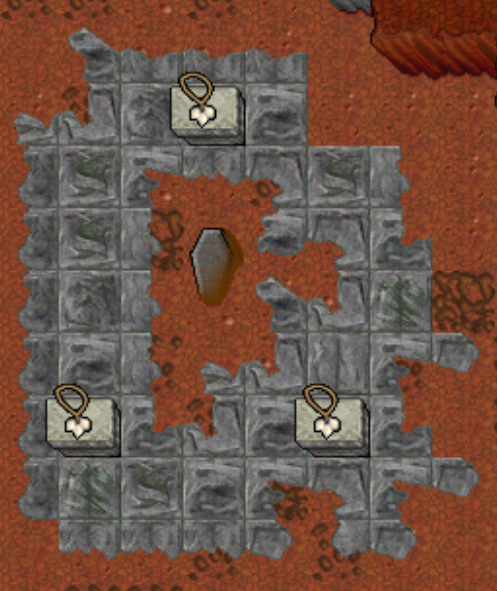
Storkus: Before ye' open his coffin and drag that beast out to destroy it, I advise ye' to place some garlic necklaces on the stone slabs next to his coffin. That will weaken him considerably. ...
Storkus: Bring me his ring as proof for his death. And now hurry and good hunt to ye'.
The Count lies buried beneath the Green Claw Swamp, near the Blood Herb clearing between Venore and Kazordoon. Bring your machete for the jungle grass.
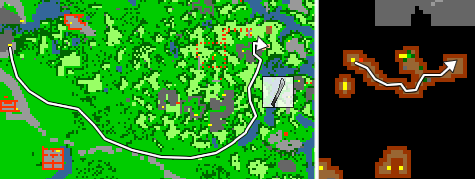
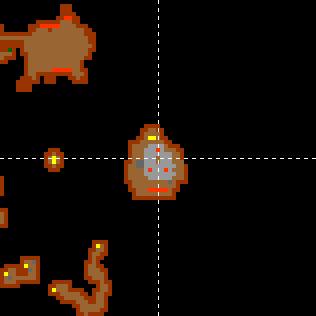
- Cut through the jungle grass and take the hole down, then the stairs below that — two floors under the swamp.
- You find a buried coffin ringed by three counters. Use the coffin to wake him.
- Kill him and take
 The Ring of the Count back to Storkus, then report to Henricus.
Conversations — the ring & the report
Back at Storkus, ring in hand
Player: mission
Storkus: Ding, dong, the vampire is dead, eh? So I guess ye' can return to Henricus and tell him that ye' finished your job here. I'm quite sure he has some more challenging task up his sleeve. ...
Storkus: One more thing before ye' leave: I already mentioned the master vampires. ...
Storkus: They are quite hard to find. If ye' stumble across one of them and manage to kill him, he will surely drop some token that proves his death. Bring me these tokens. ...
Storkus: If ye' kill enough of them, I might have a little surprise for ye'.
Reporting to Henricus
Player: mission
Henricus: Your current mission is to help the vampire hunter Storkus. Are you done with that mission?
Player: yes
Henricus: Good, you've returned. Your skill in practical matters seems to be useful. If you're ready for a further mission, just ask.
Garlic Necklace on each of the three counters before using the coffin, and the
creature that rises is The Weakened Count — barely more than a common vampire.
Skip the garlic and you face The Count at full strength, summons and all. He has
ended many careless hunters.Died and lost the ring? Use the coffin again and he rises once more. And a Count that someone else woke and abandoned crawls back into his coffin on his own after a while — the room never stays blocked.
Henricus hands you a fresh vial of holy water
.
Somewhere between Venore and Darashia a cursed wreck drifts — the Ghost Ship —
and a spot on her deck anchors an old evil.
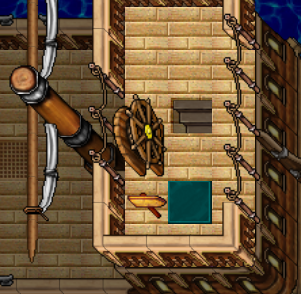
- Book passage to Darashia with Captain Fearless in Venore. Any crossing may be the one the wreck takes — and while you carry this mission it always takes you within ten crossings, so the sea can toy with you but never lock you out. (Sail it without the mission and it stays the old legend: roughly one crossing in ten, forever.)
- The deck is crewed by ghosts, skeletons, demon skeletons and vampires. Surviving them is the mission.
- Find the cursed spot on the deck and pour the holy water over it. The wailing stops — the curse lets go.
- A ghostly captain will carry the living back to shore. Report to Henricus.
Go in supplied — the deck is the fight, and there is no walking away from a ship at sea. Don't report the mission until the deed is done. If the sea claims your vial, say vial to Henricus — a fresh one costs 1,000 gold.
Conversation — Henricus
The briefing
Player: mission
Henricus: We've got a report about a ship that should have sunk a lifetime ago and still sails. It crosses the water between Venore and Darashia, and it is not crewed by the living. ...
Henricus: Book passage with Captain Fearless in Venore and sail for Darashia. Sooner or later the wreck will find you - it always does. ...
Henricus: Somewhere on that deck there is a spot where the curse is anchored. Use this vial of holy water on it and drive the evil out.
Reporting back
Player: mission
Henricus: Your current mission is to cleanse the ghost ship. Are you done with that mission?
Player: yes
Henricus: Well, this was an easy task, but your next mission will be much more challenging.
The simplest mission on paper: bring Henricus 20 Demonic Essences
. Demons and their kin drop them.
Hand them in, then ask him for your outfit — and the full Demon Hunter outfit is yours, both male and female, no addons needed. On Alzeria this is the complete outfit, earned here and nowhere else.
Conversation — Henricus
Player: mission
Henricus: You've handled heretics, witches, vampires and ghosts. Now be prepared to face the most evil creatures we are fighting - demons. Your new task is extremely simple, though far from easy. ...
Henricus: Go and slay demonic creatures wherever you find them. Bring me 20 of their essences as a proof of your accomplishments.
Handing in the essences
Player: mission
Henricus: You're indeed a dedicated protector of the true believers. Don't stop now. Kill as many of these creatures as you can. ...
Henricus: I also have a reward for your great efforts. Talk to me about your demon hunter outfit anytime from now on. Afterwards, let's talk about the next mission that's awaiting you.
Player: mission
Henricus: Here is your demon hunter outfit. You deserve it.

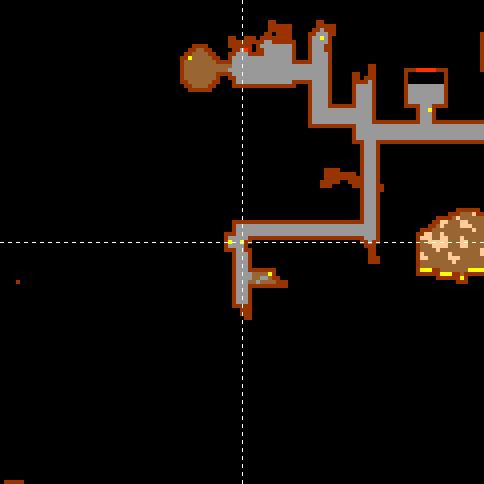
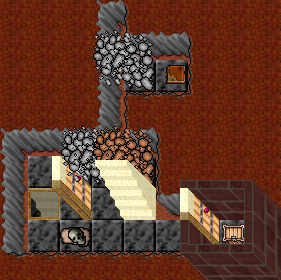
The Inquisition's investigators found something stirring beneath Edron — before a demon named Ungreez slew them. Your task is revenge.
- Descend the Edron Hero Cave. Deep below, a sealed door opens only for those on this mission.
- Ungreez fights like a true demon — 8200 health and every trick the pit taught him. The kill is credited to whoever deals the most damage, so in a group, make your hits count.
- Report to Henricus.
Unlike the old tales, the chamber does not seal behind you after reporting — you may return.
Conversation — Henricus
The briefing
Player: mission
Henricus: We've got information about something very dangerous going on on the isle of Edron. The demons are preparing something there ...
Henricus: Something that is a threat to all of us. Our investigators were able to acquire vital information before some of them were slain by a demon named Ungreez. ...
Henricus: It'll be your task to take revenge and to kill that demon. You'll find him in the depths of Edron. Good luck.
After the kill
Player: mission
Henricus: So the beast is finally dead! Thank the gods. At least some things work out in our favour ...
Henricus: Our other operatives were not that lucky, though. But you will learn more about that in your next mission.
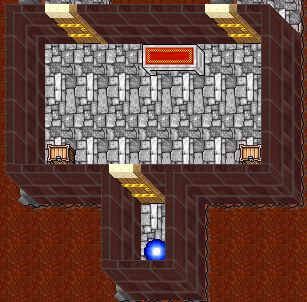
This is the hardest content on Alzeria. Henricus gives you one last vial of holy water and points you at the Demon Forge: through the portal beyond the Vampire Shield room in the Edron Hero Cave. The way in demands three things of every single player:
You land in fire — the entrance is defended. Cut through and make for the Retreat, the safe hall that anchors the whole Forge.

Conversation — Henricus
The briefing
Player: mission
Henricus: Our operatives in the Demon Forge found the source of it all - a shadow nexus, a wound in the world that the Ruthless Seven pour their power through ...
Henricus: It stands in the deepest hall, past all seven of their minions. Slay them, then destroy the nexus with this vial of holy water. It will not break at the first pour - keep at it.
If you lost the vial
Player: vial
Henricus: Careless. The nexus still stands - I can consecrate another vial for 1000 gold. Do you want it?
Player: yes
Henricus: Guard it better this time.
After the nexus falls
Player: mission
Henricus: Have you truly destroyed the shadow nexus?
Player: yes
Henricus: Incredible! You are a true defender of the faith. I grant you the title of High Inquisitor for your noble deeds ...
Henricus: From now on you may obtain the blessing of the inquisition, which makes the pilgrimage of ashes obsolete. The reward chamber below is open to you.
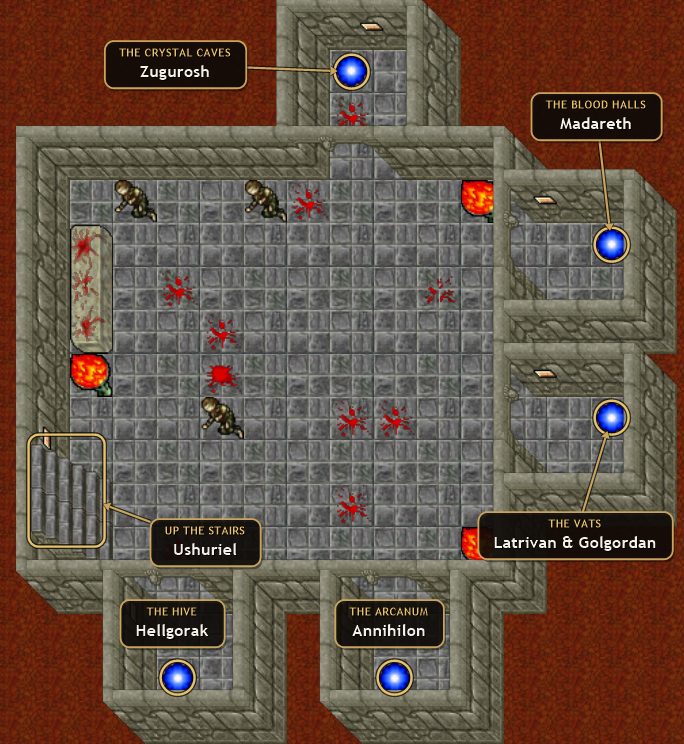
- Kill a ward's boss, then leave through the boss room's own portal within 3 minutes. That is what unlocks the next area for you — loot too long and the way forward closes, and the portal dumps you back in the Retreat.
- Progress is personal. Helping kill a boss means nothing unless you walk out through its portal in time.
- Every area you reach unlocks a permanent shortcut portal in the Retreat. Die, resupply, come back next week — your shortcuts remain. There is no shortcut to the Shadow Nexus itself.
- Every area also has an escape portal near its landing spot that returns you to the Retreat at any time, no questions asked.
- Step into a boss portal while the boss lives and it simply throws you back to the Retreat. Nothing is lost — walk back in and try again.
 Ushuriel
Crystal Caves
The Labyrinth
The Depths
Ushuriel
Crystal Caves
The Labyrinth
The Depths
 Zugurosh
Blood Halls
The Foundry
Zugurosh
Blood Halls
The Foundry
 Madareth
The Vats
The Battlefield
Madareth
The Vats
The Battlefield

 Golgordan & Latrivan
The Arcanum
Soul Wells
Golgordan & Latrivan
The Arcanum
Soul Wells
 Annihilon
The Hive
Annihilon
The Hive
 Hellgorak
The Shadow Nexus
Hellgorak
The Shadow Nexus
His chamber bristles with magic throwers — pillars that pelt everyone in range. Put the boss down fast and don't linger in the crossfire. Beyond him: the Crystal Caves, where frost dragons and spectres hunt among crystal spiders, then a labyrinth and the flooded Depths.
The road to Ushuriel

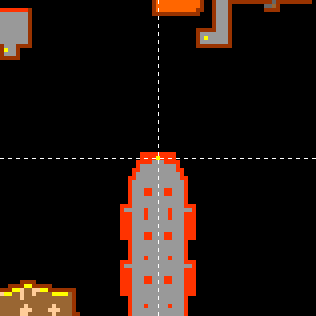

The single toughest hide in the Forge — over 90,000 health. Worse: cursed pillars ring his room and strip your shielding to almost nothing the whole fight. You cannot block your way through this; you out-heal it or you run dry. Beyond him the Blood Halls rise three floors, packed with dark torturers and betrayed wraiths, into the Foundry.
The road to Zugurosh
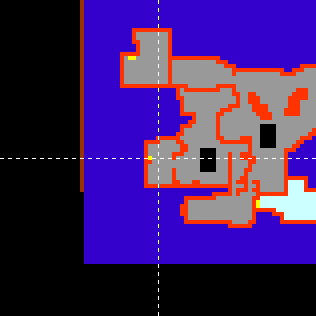

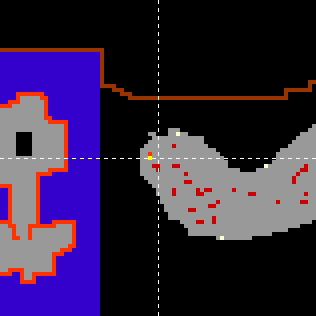

The labyrinth — step by step9 legs · 3 floors
Nine legs across three floors. The stairs never take you straight up — you climb, drop back down, and climb again. Green is where you arrive on the floor, the red arrow is the stairs you leave by.









A pure damage boss — and a binding pillar in her chamber that paralyses everyone near it, over and over. You cannot kite her. Stand, trade, and heal through it. Afterwards: the plague-soaked Vats and the burning Battlefield.
The road to Madareth



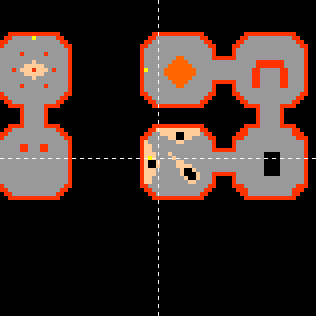
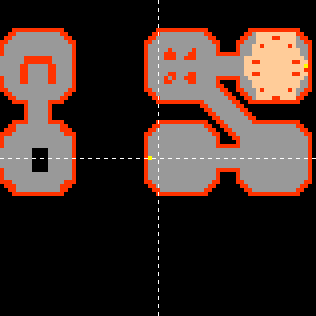
Fought together, in a chamber walled with 24 throwers. Golgordan closes in with his fists while Latrivan burns you from range — and they demand two kinds of damage: Golgordan shrugs off steel, so burn him; Latrivan walks through fire, so cut him down. The portal onward opens only when both are dead, with the 3-minute clock starting at the second kill. Beyond them: the three halls of the Arcanum and the Soul Wells.
The road to the Twins
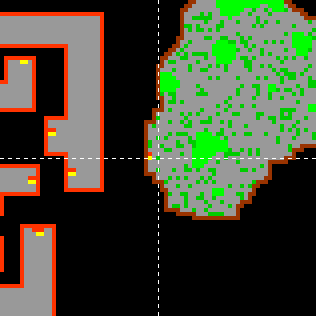
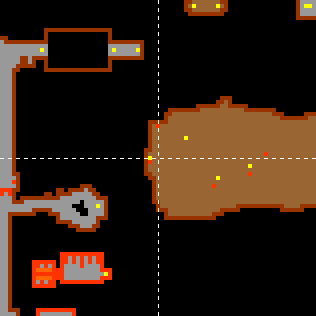
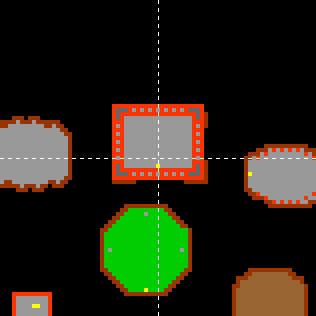
Hell holes gape across his floor and pour out fire elementals endlessly. The holes cannot be closed — keep the swarm off your shooters and kill the boss, not the flood. Then up through the Hive.
The road to Annihilon



He means it. Hellgorak shrugs off 98% of all damage — except ice. The only
ice in the room is the Dreadbeasts he himself summons.
 Convince them and turn them on their master — that is the fight: keep your
stolen beasts alive while they gnaw him down, while he calls fresh ones to replace them.
Druids win this room.
Convince them and turn them on their master — that is the fight: keep your
stolen beasts alive while they gnaw him down, while he calls fresh ones to replace them.
Druids win this room.
The road to Hellgorak
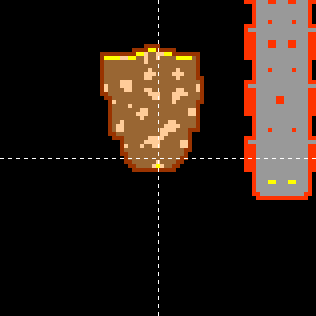
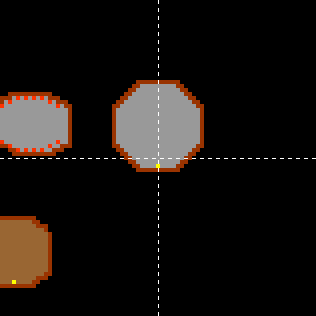
The final chamber. Five skull pillars conjure demons without end — they are worth no experience and carry no loot, so killing them is a waste of everything. Hold them off. In the centre stands a magic wall: the Shadow Nexus. Your vial of holy water breaks it — in four pours, against a timer.

 The wallPour holy water on it
 Electrified · 20sUntouchable — wait
 Burning · 20sPOUR NOW
- Each pour sets the wall alight for 20 seconds — it cannot be harmed while lit. When the light dies you have 20 seconds to pour again. Miss that window and the nexus heals itself completely. Start over.
- The fourth pour shatters it. For the next 20 seconds, every player on the mission may pour their own vial on the wreck to complete it too — the whole team finishes off one break.
- Only the shattering pour and the claiming pours consume a vial — helpers keeping the rhythm lose nothing. Lost yours on the way down? Say vial to Henricus — a fresh one costs 1,000 gold.
- Then walk out, sail home, and tell Henricus what you did. High Inquisitor.
Beneath Henricus, sealed doors open for those who finished the quest. Eight chests — opening one empties the other seven for you, forever. Choose like it matters.
 Hellforged Axe
 Royal Crossbow
 Spellbook of Dark Mysteries
 Robe of the Underworld
 Fireborn Giant Armor
 Master Archer's Armor
 Cobra Rod
 Skull Wand
Every reward comes out unidentified at the highest quest tier on the server — it will roll Monster Tier 8 or 9 when revealed. Bring a Scroll of Identification.
Beside the choice stand three bonus chests that everyone who completed the quest may open — all three, no choosing:
 Dwarven LegsFound nowhere else
 Outfit Doll
Unlocks an outfit of your choice
Outfit Doll
Unlocks an outfit of your choice
 Auto Loot Slot Stone
+5 auto loot slots, up to 30
Auto Loot Slot Stone
+5 auto loot slots, up to 30
From the day you finish, Henricus will grant you all five blessings at once. Say bless to him — 60,000 gold for the full set, and the pilgrimage of ashes is yours to skip forever.
He only charges for what you lack: already carrying two blessings? You pay 36,000 for the remaining three. Requires having touched a Pits of Inferno throne.
Conversation — buying the blessing
Player: bless
Henricus: The blessing of the inquisition bestows all five at once and makes the pilgrimage of ashes obsolete. It costs 60000 gold. Do you want to receive it?
Player: yes
Henricus: Kneel. By the authority of the inquisition, receive what you lack.

